Antique Rocking Chair Frame — Rebuilt and Refinished
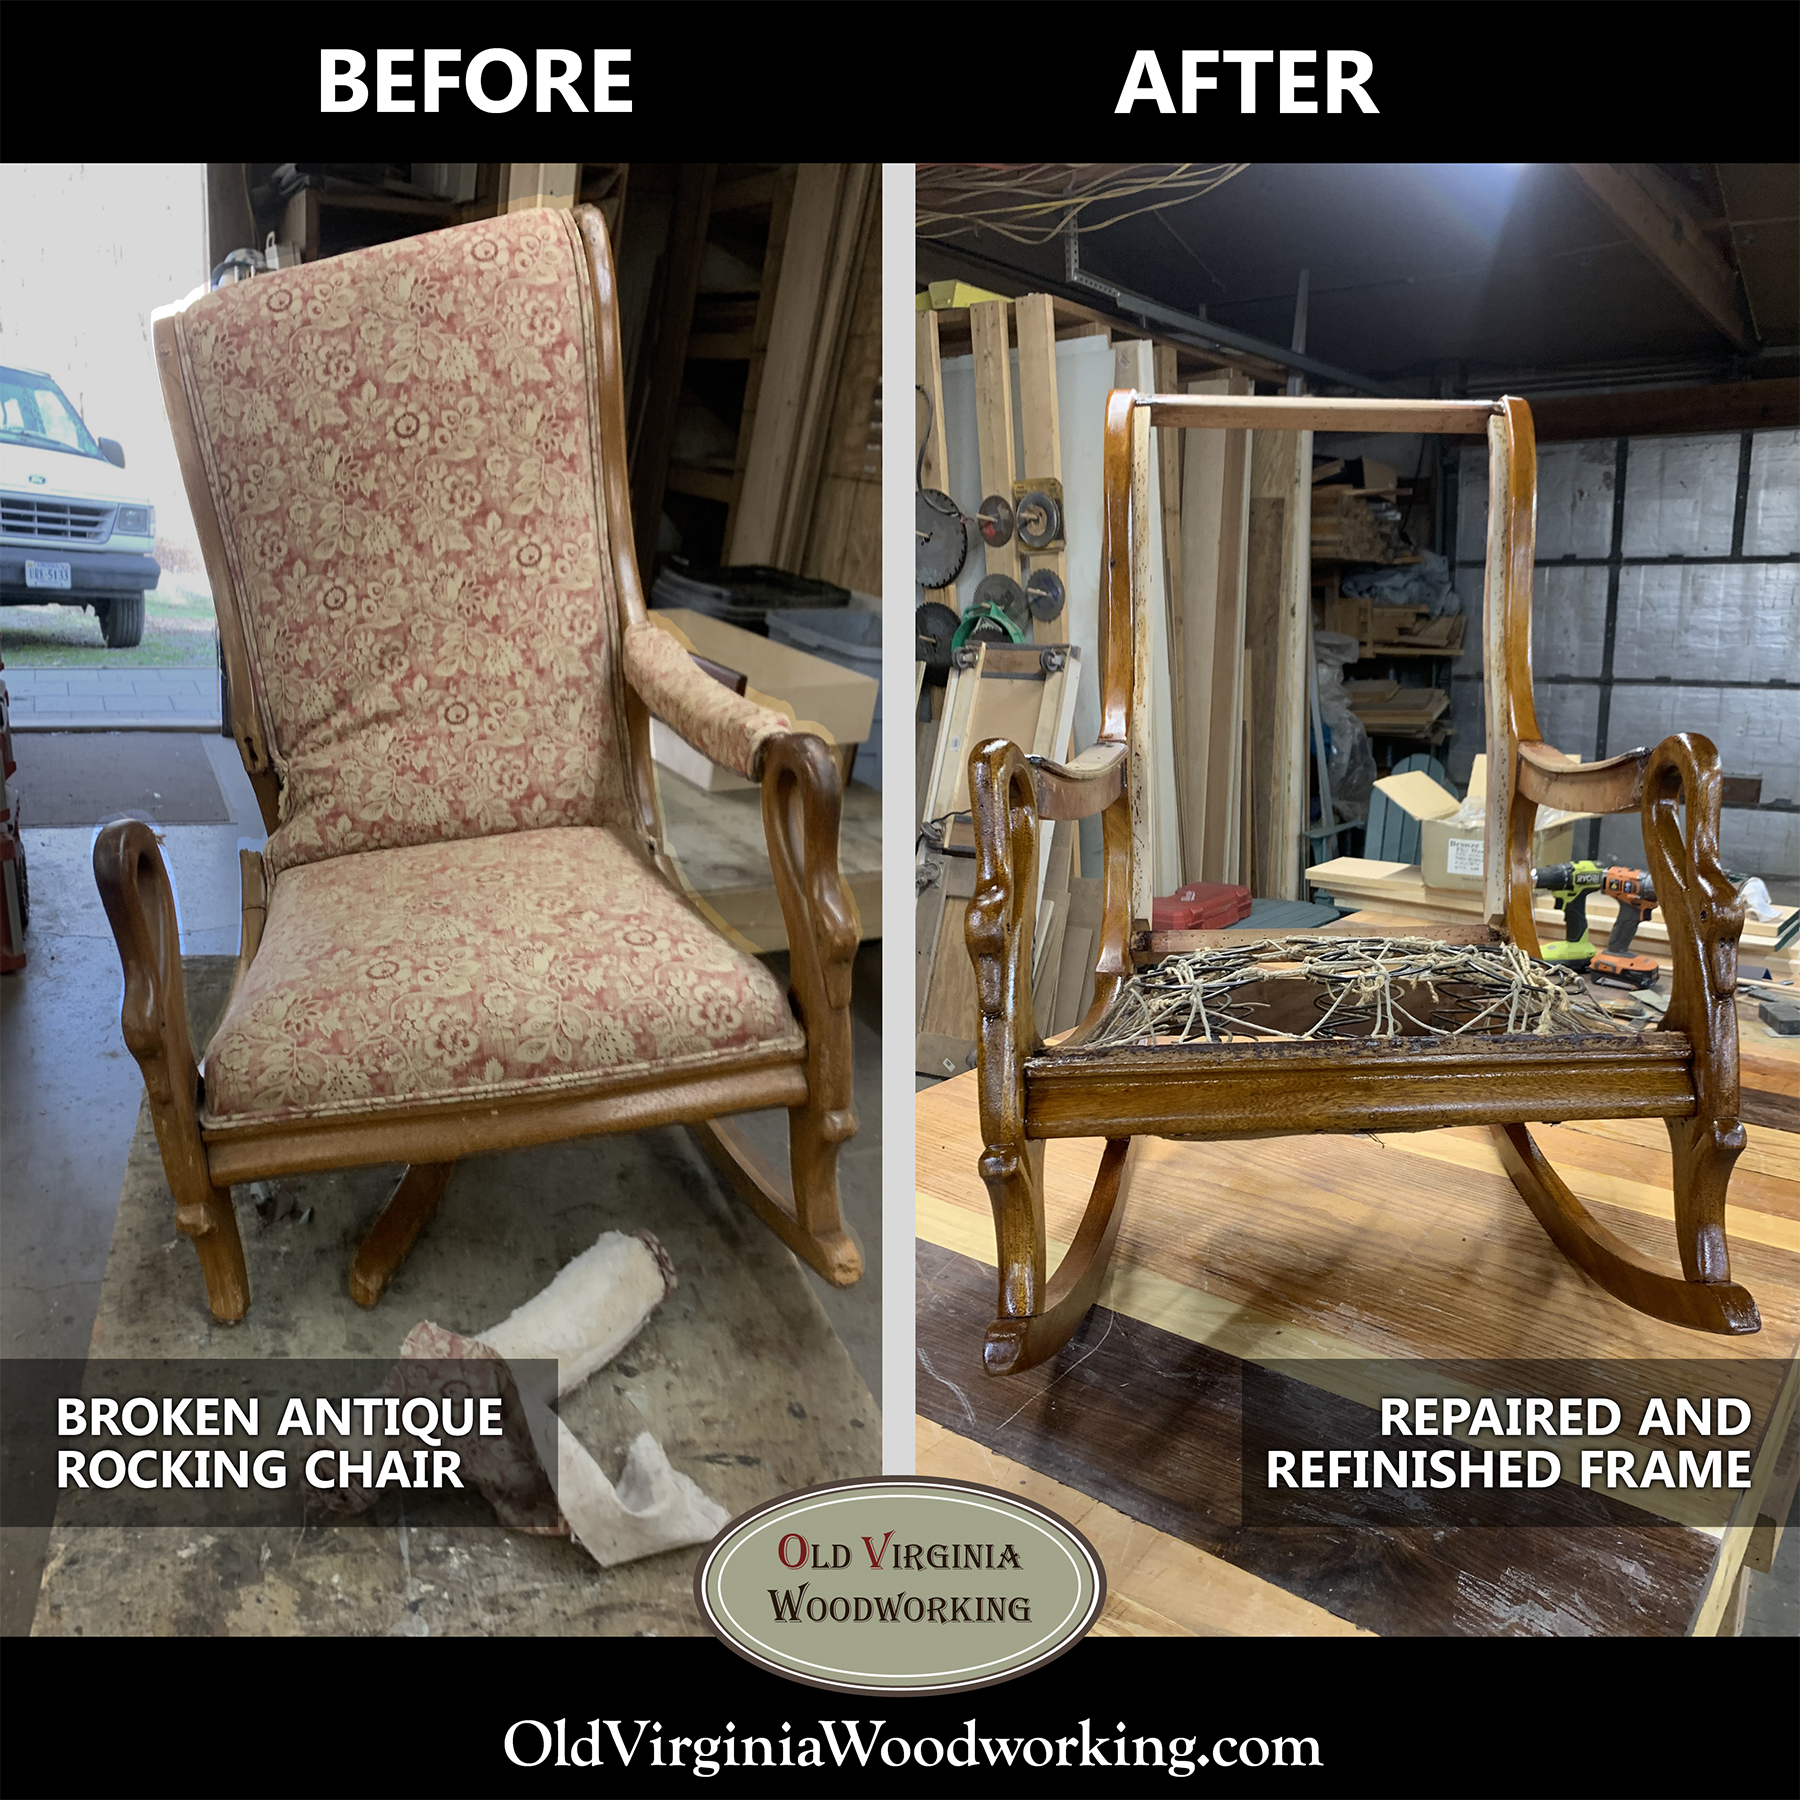
This rocking chair came in all smashed up, looking more like food for the dumpster than something to rebuild.
Initially, the owners of this piece weren’t sure they wanted to invest in the substantial work that was needed to get this chair rocking again. They left me some other chairs to work on and this one to diagnose for repair. It sat in my shop for several days before I could take a good look at it to find out exactly what needed to be done. I kept walking past that piece so bedraggled and worn and kept thinking “somebody should save that rocker.”
While I couldn’t do the upholstery work (my woodshop is not the place for that kind of work), I knew I could rebuild the frame and get the finish looking great. I wanted to give this chair new life, and thankfully, the owners decided to have me do just that.
Rebuilding an Antique Rocker
When this chair came into my shop it wasn’t just damaged, it was in pieces. One rocker was unattached, several joints were severely broken, and its bracing was hanging loose and held together only by the upholstery fabric.
The two main side pieces ran full length from the top of the back rest all the way down to the rockers, and they both needed to be replaced.
I could see these side pieces were quite complex, even for the guys that made them. As I worked, numerous joints with dowels had to be fitted and attached at strange angles. This made them nearly impossible to lay out and get properly drilled. I partly traced the old sides for shape and size, but, with large pieces gone, I had to fill in the lines as best I could.
To shape the curves I used a large bandsaw to cut, nibble, and chew. Then, after releasing the new side pieces from a heavy mahogany board, I sanded them using machine sanders.
Before I attached any new wood, I had to remove all the old upholstery fabric. Boy, was there a lot of it, layer upon layer. The pieces filled a twenty-gallon garbage can to the brim. I burned them all in my giant woodstove on a cool day giving that fabric one useful but final purpose.hen came the test. Would those wood side pieces actually assemble properly? Would they look and work correctly? I dry fitted them part way to check the fit and it went well, which meant it was time to make it permanent.
At that point I knocked apart my dry fit work and mixed up some slow drying epoxy. I wanted a slow drying glue for this to give me plenty of time to work, rework, and solve any problems before the glue set up.
I had a few issues with this assembly, but who would knot?
The wood had crumbled away at some of the original connections so that it was nearly impossible to discern what the original shape of the joint was. At those locations I mixed a good deal of thickener into my epoxy adhesive so that I could build up a joint connector out of the hardened adhesive.
Bingo! It bonded like crazy and the epoxy connector will be hidden by the new upholstery.
This chair will live to rock for many more years now.
Refinishing to Match the Original
The final step was applying the finish. After some final sanding I brushed on four coats of amber shellac using the same finish as the original on this antique rocking chair frame.
The photos above show the rebuilt and refinished rocking chair frame before it left my shop. It was taken straight to the upholsterer. Maybe the owner will email me a photo some day and we can post it here.